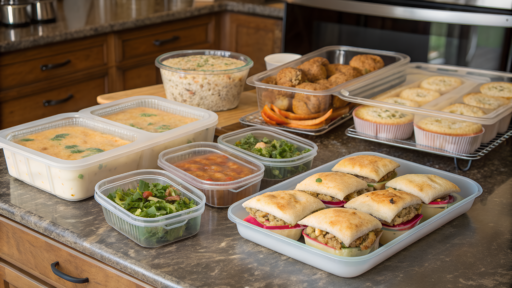

Trips to the mountains with family are not just about snow, slopes, and beautiful views. They also mean hungry kids, tired adults, an unfamiliar kitchen in a rental house, and very little time to make decisions. In moments like this, ski trip meal prep ideas for families stop being inspiration from the internet and turn into a real necessity.
Here we’ll talk about breakfasts you can reheat without putting in much effort or time. About lunches that actually survive until midday in the cold. About dinners that don’t require energy at the exact moment when there’s simply none left. There are no complicated recipes or rare ingredients here. Only proven meals that hold up during mountain trips and don’t fall apart at the worst possible time.
1. Freezer Breakfast Burritos You Can Reheat Half-Asleep
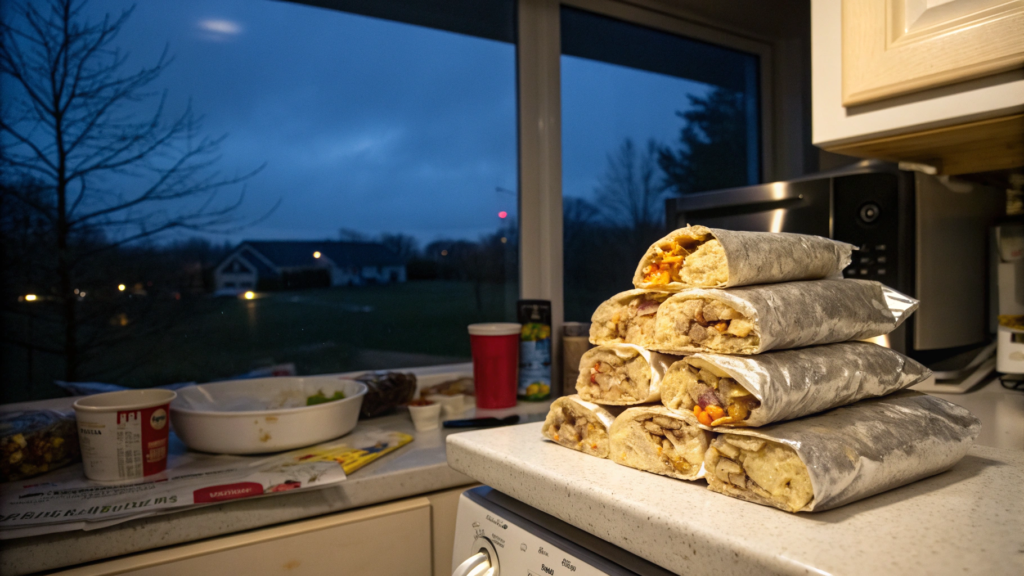
Early morning. Dark outside. Kids are still half asleep, and you need to feed everyone something real. Not cookies. Not a bar.
That’s exactly where freezer breakfast burritos come in handy. We’ve tested this more than once. They always turn out tasty. And filling.
Yes, this kind of prep is what makes ski trips with kids much calmer.
Why burritos and not “something simpler”
Burritos are great because they combine protein (eggs, meat, cheese), carbs (tortilla, potatoes), and fats that actually help keep you warm in cold weather.
And all of it is wrapped into one bundle. Nothing crumbles. Nothing leaks. You can eat it in the car, in the cabin, or hand it to a child without panic.
By the way, burritos handle freezing really well. The texture doesn’t suffer if everything is assembled correctly.
Ingredients (for 8–10 burritos)
Base:
- 10 large wheat tortillas (about 10 inches / 25 cm)
- 12 large eggs
- 1 lb breakfast sausage or ground turkey (≈ 450 g)
- 2 cups shredded cheese (cheddar or blend, ≈ 200 g)
- 2 cups frozen hash browns (≈ 300 g)
Optional add-ins:
- 1/2 cup finely chopped bell pepper (≈ 75 g)
- 1/2 cup green onions
- salt, black pepper
- 1 tsp smoked paprika
- 1/2 tsp garlic powder
We usually make half the batch without vegetables — kids eat those more willingly.
How to cook (no extra movements)
- Brown the potatoes until golden. I spread the hash browns in a well-heated pan and let them cook undisturbed for the first couple of minutes. We want a crispy crust, not a boiled texture. Then I transfer everything to a large bowl.
- Cook the meat and add flavor. In the same pan, cook the sausage or ground meat until done, breaking it up with a spatula. At the end, add salt, pepper, and smoked paprika — that smell in the mountains works better than any alarm clock.
- Make soft scrambled eggs. Beat the eggs with a fork and cook over medium heat, stirring constantly. Stop earlier than you think you should. Slightly undercooked eggs freeze much better and won’t turn dry later.
- Combine the filling in one bowl. Mix potatoes, meat, eggs, and shredded cheese gently so the filling stays layered, instead of turning into mush.
- Fill and roll the burritos. Place the filling closer to the bottom edge of the tortilla, fold the bottom up, and roll tightly. The tighter the roll, the better they’ll hold their shape after freezing.
- Prep for the freezer. Wrap each breakfast burrito in parchment paper or foil, then place them in a bag or container. Write the date — in a couple of weeks you’ll thank yourself for it.
You can reheat them in the microwave. Remove the foil, wrap in a paper towel, and heat for 2–3 minutes. Or in the oven at 350°F (≈ 175°C) for 25–30 minutes right in the foil.
We use a Vacuum Sealer Machine for Food Storage — it saves freezer space and removes that “freezer taste” that can ruin make-ahead meals.
Why this works on a trip
These burritos don’t ask for much. You just take one out, reheat it, and know your family is getting a proper breakfast with protein, warmth, and real satiety.
They easily survive the freezer, the drive, and even breakfast in the car at the base parking lot. Nothing falls apart, nothing drips, and no plates are required.
And yes, kids eat them without persuasion — which already feels like a luxury.
2. One-Pan Baked Pasta That Feeds Everyone After Skiing
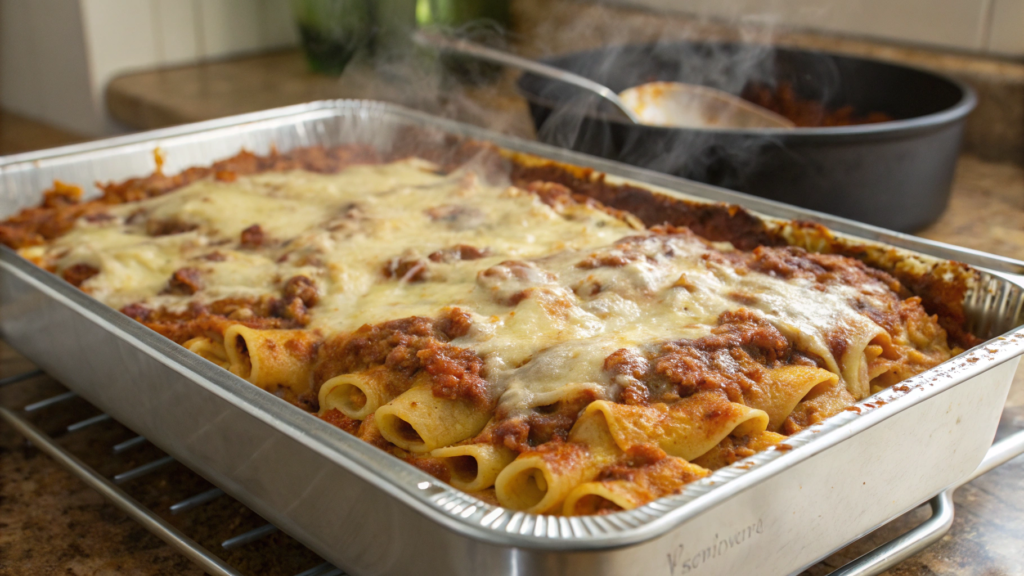
I like this option for its simplicity. One pan. No pots that you then have nowhere to wash in a rental house. And most importantly — it’s actually filling. Carbs help restore energy, protein keeps you full longer, and hot food after the cold hits instantly.
Pasta after skiing works almost perfectly, because the body has already burned through its glycogen stores, muscles want food, and kids want to eat now, not in an hour.
Baking makes the dish feel more warm and substantial. The sauce coats the pasta, the cheese holds everything together, and even picky eaters find a piece they’re happy with.
Ingredients (for a large family, 6–8 servings)
Base:
- 1 lb penne or rigatoni pasta (≈ 450 g)
- 1 lb chicken breast or ground turkey (≈ 450 g)
- 3 cups pasta sauce (≈ 700 ml)
- 2 cups shredded mozzarella (≈ 200 g)
- 1/2 cup grated Parmesan (≈ 50 g)
Vegetables (depending on what you have):
- 1 cup zucchini, diced (≈ 120 g)
- 1 cup bell pepper (≈ 150 g)
- 1 small onion, finely chopped
Spices:
- 1 tsp salt
- 1/2 tsp black pepper
- 1 tsp Italian seasoning
- 1/2 tsp garlic powder
How to cook (no stress, no complicated steps)
- Cook the pasta to al dente. Don’t overcook it. It will finish cooking in the oven and keep its shape instead of turning into something soft and mushy.
- Prepare the filling. Sauté the chicken or ground meat with the onion until cooked through. Add the vegetables and warm them for a couple of minutes — we’re not aiming for full softness, just color and aroma.
- Assemble everything directly in the pan. Add the pasta, meat with vegetables, pour in the sauce, and gently mix. This is the moment when everything starts to look really appetizing.
- Add the cheese. First the mozzarella, then the Parmesan. I lightly press the cheese in with a spoon so it ends up both inside and on top.
- Bake. 375°F (≈ 190°C), for 25–30 minutes, until the top is golden and bubbling.
Practical tip for mountain trips
This baked pasta is best assembled ahead of time, at home. I simply mix everything in a large container, cover it with a lid, and store it in the fridge. On ski day, all that’s left is to transfer it to a baking dish and put it in the oven. No chopping. No “what do we even have?”
If the trip is longer, you can assemble the pasta completely, including the cheese, and freeze it. In a rental house, it bakes just fine straight from the fridge (or after partial thawing) — just add 10–15 minutes to the oven time.
And yes, make this dish slightly less salty than usual. After an active day, kids often wash dinner down with water or hot cocoa, and saltiness comes through much stronger. It’s better to let everyone add salt on their own at the table.
3. Thermos-Friendly Soups That Stay Hot Until Lunch
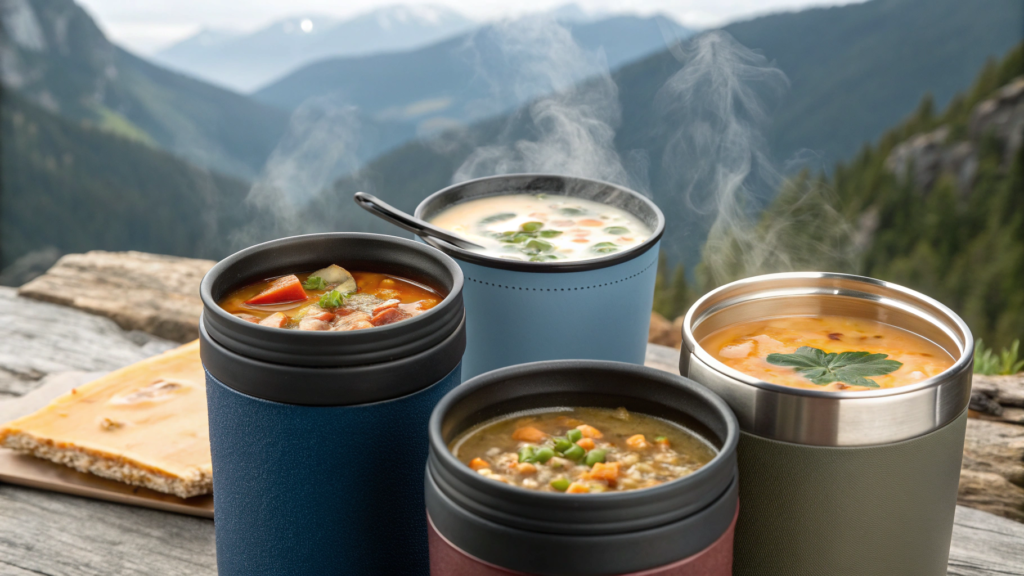
Yes, a hot lunch in the mountains that actually stays hot for 4–5 hours… yes, that’s something to think about.
I’ll say this right away: not every soup works for this. And it’s not just about the thermos. Consistency, fat content, and ingredient size all matter.
Which soups really work for a thermos
The best options are thick soups (not broths), with starch or legumes, and a decent amount of fat.
Our favorites:
- chicken soup with rice or orzo
- lentil soup
- creamy potato soup with bacon
- thick minestrone
Clear broths cool down faster and turn into warm water by lunchtime — tested, unfortunately.
Ingredients (basic chicken soup version for a thermos)
- 1.5 lbs boneless chicken thighs (≈ 680 g)
- 1 cup rice or orzo (≈ 180 g)
- 1 cup carrots, small dice (≈ 130 g)
- 1 cup celery (≈ 120 g)
- 1 small onion
- 8 cups chicken broth (≈ 1.9 L)
- 2 tbsp olive oil
- 1.5 tsp salt
- 1/2 tsp black pepper
- 1 tsp dried thyme
- bay leaf
How to cook (so the soup actually holds heat)
- Start with an aromatic base. Heat olive oil in a pot, add the onion, carrots, and celery. Cook for 5–7 minutes, until the vegetables are soft and fragrant. This step matters — it’s what gives the soup real depth of flavor.
- Add the chicken and spices. Add the chicken thighs whole, without cutting them. This keeps them juicy. Add salt, pepper, thyme, and the bay leaf right away.
- Add broth and simmer slowly. Bring to a boil, then lower the heat and cook for 25–30 minutes. The soup should be hot and rich, not aggressively boiling.
- Remove the chicken and add the grain. Take the chicken out and add the rice or orzo to the broth. Cook until the grain is done — it makes the soup thicker and warmer in feel.
- Shred the chicken and return it to the pot. Cut or pull the meat into large pieces. Small cuts cool down faster — yes, that actually makes a difference.
- Final heat-up. Let the soup boil for another 3–5 minutes and adjust salt. The soup should be almost too hot to eat before going into the thermos.
How to pour soup into a thermos properly
Before adding the soup, always preheat the thermos with boiling water. Fill it for 5 minutes, pour the water out, and only then add the soup. This helps retain heat for hours.
Models with a wide mouth, like a Stainless Steel Food Thermos for Hot Food, work especially well — they’re easier to clean and great for thick soups.
If the soup is thick enough, poured in very hot, and the thermos was preheated, it stays hot enough by lunchtime that kids sometimes ask to wait a minute before eating. And that’s in cold weather, in the wind, with no reheating.
4. Slow Cooker Chili That’s Ready When You Get Back
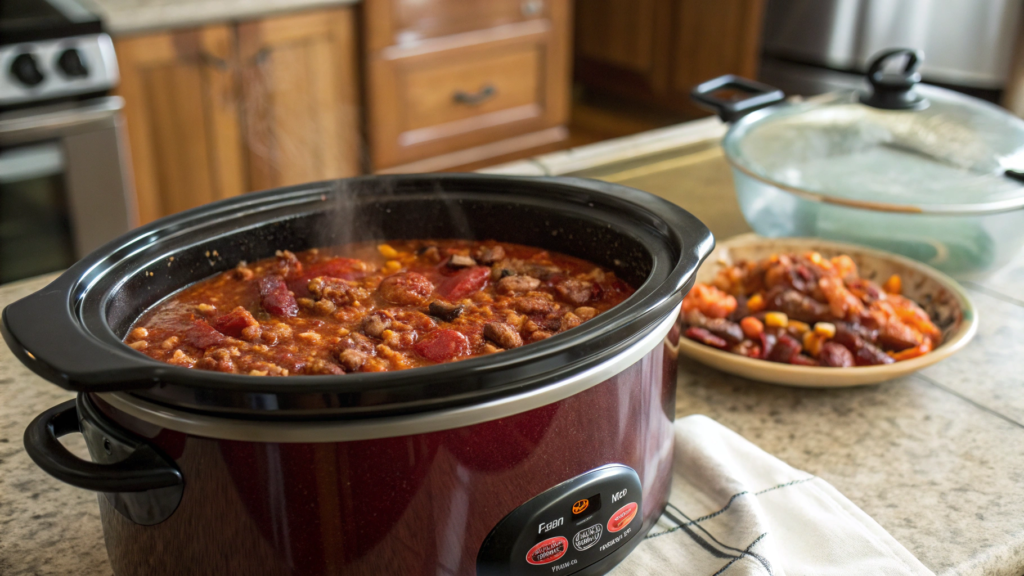
Honestly, slow cooker chili is one of the most reliable meal formats for a ski trip. You leave in the morning cold, come back tired, and realize that dinner is already done. Without your involvement. That feeling is hard to overestimate.
For ski trip meal prep ideas for families, chili is perfect because it’s thick and filling, warms you up after the cold, sits calmly on “keep warm”, and works for both adults and kids (as long as you don’t overdo the spices).
Why chili works so well in a slow cooker
Chili isn’t afraid of long cooking times. On the contrary — after 6–8 hours, the flavor gets deeper, the beans soften, and the meat becomes more tender.
And there’s nothing scary if you get delayed on the slopes or in traffic. The meal will wait for you.
Ingredients (for 6–8 servings)
- 1.5 lbs ground beef or ground turkey (≈ 680 g)
- 1 large onion, finely chopped
- 3 cloves garlic
- 2 cans red kidney beans, drained (2 × 15 oz / ≈ 850 g)
- 1 can crushed tomatoes (28 oz / ≈ 800 g)
- 1 cup tomato sauce (≈ 240 ml)
- 1 cup beef or chicken broth (≈ 240 ml)
Spices:
- 1.5 tsp salt
- 1 tsp black pepper
- 2 tsp chili powder
- 1 tsp ground cumin
- 1/2 tsp smoked paprika
For kids, I always reduce the amount of chili powder — spicy food doesn’t work for everyone in the cold.
How to cook (so you don’t do anything in the evening)
- Quickly brown the meat. Brown the ground meat in a pan until it changes color. We’re not aiming for a perfect crust — just getting rid of the raw state and excess fat.
- Add onion and garlic. Warm them with the meat for 2–3 minutes until fragrant. It doesn’t take long, but the chili flavor becomes noticeably richer.
- Transfer everything to the slow cooker. Add the beans, tomatoes, tomato sauce, and broth. Mix everything directly in the crock.
- Season and close the lid. Add all the spices, gently stir, and cover. Cook:
- LOW — 6–8 hours
- HIGH — 3–4 hours
- LOW — 6–8 hours
- Taste before serving. Beans sometimes absorb salt. I always adjust the seasoning right before dinner.
If you plan to keep the chili on warm after it’s done, add a bit of broth — about 1/2 cup. This keeps it from getting too thick or drying out around the edges.
You can serve it on a trip with shredded cheese, corn chips, or a spoon of sour cream or Greek yogurt. This is one of those meals where everyone builds their bowl their own way, and you don’t need to cook anything separately.
5. High-Protein Muffins for Cold Mornings on the Go
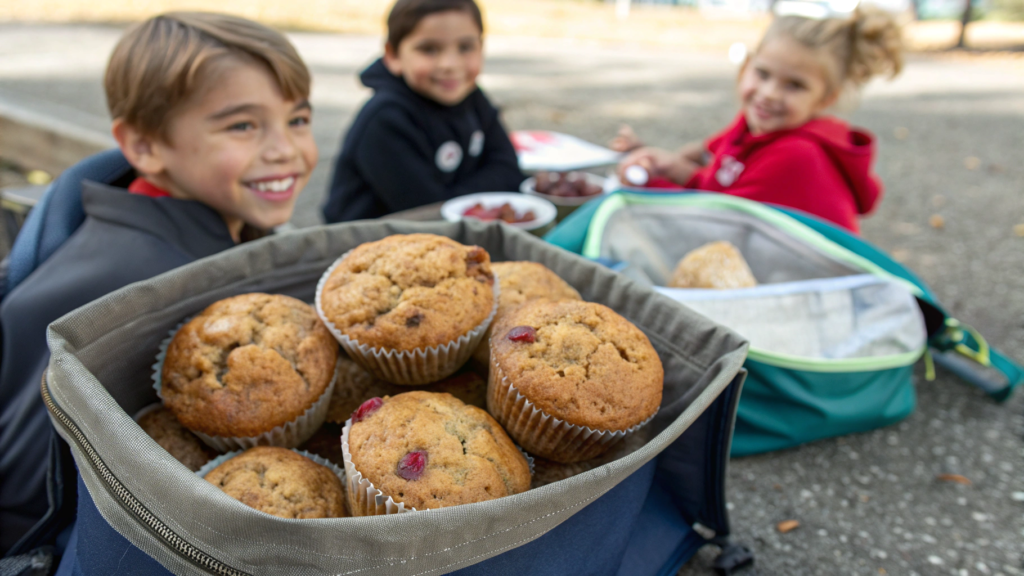
High-protein muffins are not “sweet baked goods with coffee.” They’re real food you can grab with one hand, eat on the way, and not feel hungry again thirty minutes later.
These muffins don’t crumble, don’t need reheating, sit calmly in a bag, and actually hold you until lunch. And kids eat them happily, too.
What makes muffins truly filling
The secret isn’t protein powder (though it can be useful). It’s the combination of:
- eggs,
- dairy,
- oats or whole-grain flour,
- nuts or seeds.
Protein with a bit of fat gives warmth and energy in the cold. That’s exactly what regular bakery muffins are missing.
Ingredients (for 12 muffins)
- 2 cups rolled oats (≈ 160 g)
- 1 cup cottage cheese or Greek yogurt (≈ 220 g)
- 3 large eggs
- 1/4 cup maple syrup or honey (≈ 60 ml)
- 1/4 cup vegetable oil or melted butter (≈ 60 ml)
- 1 tsp baking powder
- 1/2 tsp baking soda
- 1/2 tsp salt
Add-ins (choose 1–2):
- 1/2 cup chopped nuts (≈ 60 g)
- 1/2 cup frozen blueberries (≈ 70 g)
- 1/3 cup dark chocolate chips (≈ 60 g)
- 1/4 cup seeds (pumpkin or sunflower)
How to cook (so the muffins aren’t dry)
- Prepare the oat base. Blend the rolled oats in a blender until you get a coarse flour. Don’t turn it into dust — a bit of texture makes the muffins feel more alive.
- Mix the wet ingredients. In a large bowl, combine the eggs, yogurt or cottage cheese, syrup, and oil. Whisk until smooth, without overdoing it.
- Add the dry ingredients. Add the oat flour, baking powder, baking soda, and salt. Gently mix with a spatula so the batter stays thick but not dense.
- Fold in the add-ins. Add nuts, berries, or chocolate at the very end, gently spreading them through the batter.
- Fill the muffin pan. Fill the cups almost to the top — these muffins don’t rise much. Silicone molds are especially convenient for trips and don’t require liners.
- Bake. 375°F (≈ 190°C) for 18–22 minutes. Check doneness with a wooden skewer — it should come out almost dry.
I almost always bake a double batch and freeze half. In the morning, you just grab a muffin and toss it into a backpack — by the time everyone is ready, it’s soft and ready to eat.
If you make these often, a Silicone Muffin Pan, 12-Cup makes life much easier — nothing sticks, it’s easy to wash, and you can even take it with you on trips.
Tip. Don’t make the muffins too sweet. In the cold, flavors intensify, and overly sweet baked goods get tiring fast. It’s better to keep them neutral — that way they work both in the morning and after skiing.
6. No-Mess Car Snacks for Long Mountain Drives
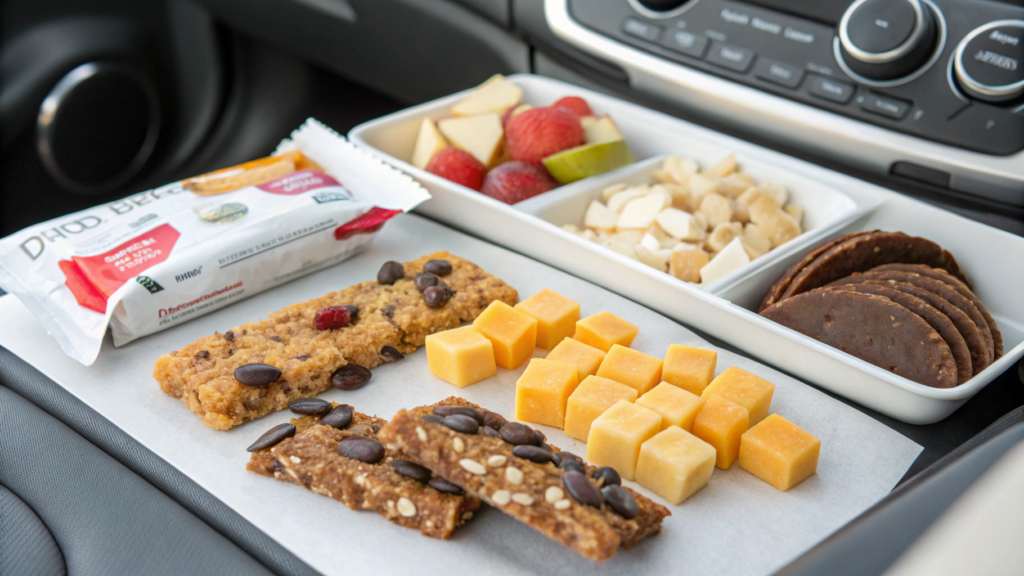
When you’re driving for several hours, no-mess car snacks stop being just a convenience and become a necessity. No one wants to scrub seats after sticky hands or shake crumbs out of cup holders somewhere on a mountain pass.
A good road snack doesn’t crumble, doesn’t melt, doesn’t require spoons or piles of napkins, and handles temperature changes without drama. Soft, slightly moist foods work best. Anything that crunches and breaks apart is almost guaranteed cleanup later.
Basic snack lineup (for a 4–6 hour drive)
- cheese sticks or sliced hard cheese
- hard-boiled eggs, peeled ahead of time
- apple slices, lightly tossed with lemon juice
- homemade oat bars or high-protein muffins
- grapes, cut in half for kids
- nuts (almonds, cashews) in small portions
We always portion food individually — it reduces chaos by a lot.
How to prep snacks ahead of time
- Slice and portion everything at home. Doing this on your lap in the car is a bad idea. When food is already ready to eat, no one starts “looking for a knife.”
- Use small containers. Smaller portions help control quantity and reduce the chance of spills.
- Add one “slow” snack. For example, nuts or cheese. They take longer to eat and actually take the edge off hunger.
- Pack everything in a separate bag. That way kids don’t dig through the main backpack and pull everything out at once.
What we stopped bringing on the road (and don’t miss)
- cookies and crackers
- chips
- glazed snack bars
- anything that melts or gets sticky
They disappear fast and leave behind nothing but a mess.
A practical detail
A Leakproof Bento Lunch Box with separate compartments helps a lot. You can pack cheese, fruit, and nuts so nothing mixes or spills.
When snacks are simple and predictable, kids get distracted less, ask for “something else” less often, and don’t start food scavenger hunts every twenty minutes. And you drive calmly, without thinking about the cleanup waiting for you later.
7. Make-Ahead Sandwich Wraps That Don’t Get Soggy
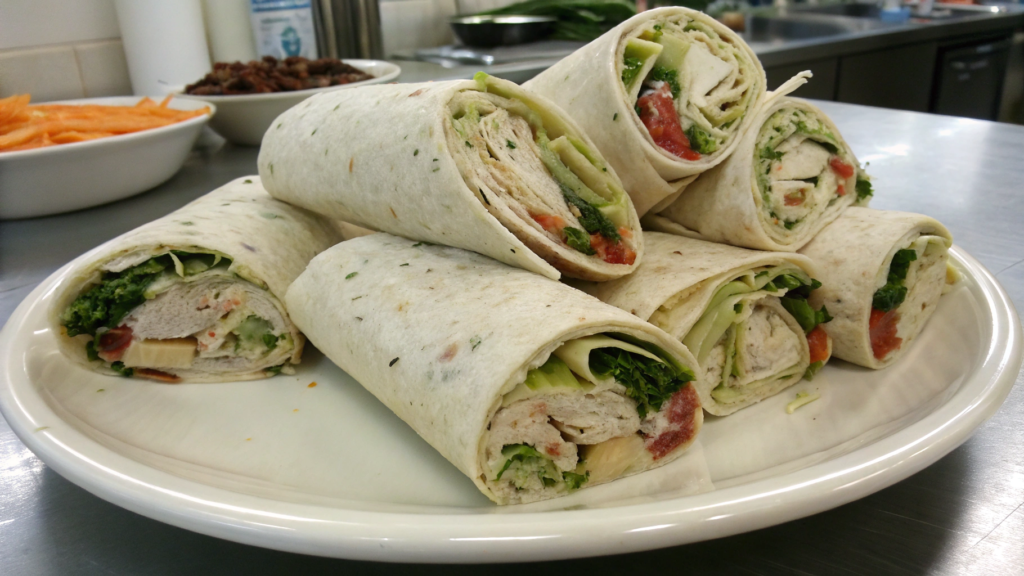
When make-ahead sandwich wraps are done the right way, they actually stay fresh, firm, and tasty even after several hours.
For a ski trip, these wraps solve multiple problems at once — they’re convenient for the drive, easy to eat in a parking lot or cabin, and don’t require plates or reheating.
The main principle: moisture protection
To keep a wrap from getting soggy, it’s not just what you put inside that matters, but the order you layer it in.
A working setup looks like this:
- tortilla (sturdy, not thin),
- fat layer,
- protein,
- vegetables with minimal moisture.
Sauces and juicy vegetables without protection are almost a guaranteed fail.
Ingredients (for 6–8 wraps)
Base:
- 6–8 large tortillas or wraps
- 1 lb roasted chicken or turkey, sliced (≈ 450 g)
- 6 slices hard cheese (cheddar, provolone)
Protective layer (choose one):
- cream cheese
- hummus
- thick Greek yogurt spread
Filling:
- 1 cup shredded lettuce (≈ 40 g)
- 1 cup thin-sliced cucumber (≈ 100 g)
- 1/2 cup grated carrots (≈ 60 g)
Seasoning:
- salt
- black pepper
How to assemble (so the wraps survive until lunch)
- Prep the tortilla. If the tortilla is cold and stiff, warm it lightly on a dry pan for 10–15 seconds. It becomes flexible and won’t crack when rolling.
- Apply the protective layer. Spread cream cheese or hummus in a thin but solid layer. This creates a barrier between the tortilla and moisture from the filling.
- Add the cheese first. Place cheese slices directly on top of the spread. Cheese adds another layer of protection and helps the wrap keep its shape.
- Add the protein. Spread the chicken or turkey evenly, not in a pile. This makes the wrap easier to roll and less likely to tear.
- Vegetables go last. Add lettuce, cucumber, and carrots at the very end and in moderate amounts. Less moisture means better results.
- Roll tightly. Fold the bottom up, then roll into a tight log. The wrap should feel compact, with no empty gaps inside.
- Wrap properly. Wrap each one in parchment paper or thick paper. Plastic wrap without paper makes wraps feel “sweaty.”
Tip. If the wraps will sit for more than 3–4 hours, cut them in half after wrapping, not before. This keeps the cut edge from drying out.
What’s best left out
- tomatoes
- fresh sauces
- pickled vegetables
- avocado without a protective layer
Even if it feels like “just a little is fine,” these are exactly what ruins wraps later.
Make-ahead wraps built this way handle the drive, waiting time, and cold without issues. They don’t fall apart and don’t leak. It’s a real lunch, just packed the right way.
8. Sheet-Pan Chicken and Veggies for Zero-Effort Dinners
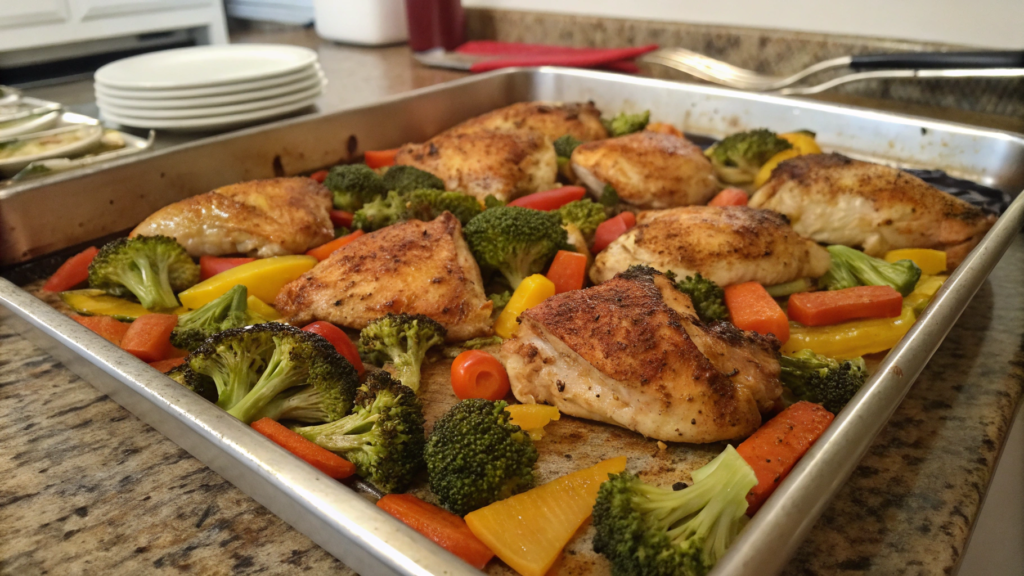
I’m convinced that sheet-pan chicken and veggies is one of the most reliable formats for ski trip meal prep ideas for families.
One pan. One oven. Minimal effort. And at the same time — real, полноценная food, not “something quick and random.”
Why the one-pan format truly saves the day
- less dishes means less cleanup in the evening
- everything cooks at the same time
- simple, familiar flavors that work for both adults and kids
- easy to scale up for a bigger group
And one more important thing: roasted vegetables and chicken reheat really well. That matters when someone eats right away and someone else later.
Ingredients (for 6 servings)
Protein:
- 2 lbs chicken thighs or breasts (≈ 900 g)
Vegetables:
- 3 cups potatoes, large cubes (≈ 450 g)
- 2 cups broccoli (≈ 300 g)
- 2 cups carrots, cut into large pieces (≈ 300 g)
- 1 large red onion, sliced into wedges
Seasoning:
- 1/4 cup olive oil (≈ 60 ml)
- 1.5 tsp salt
- 1/2 tsp black pepper
- 1 tsp paprika
- 1 tsp garlic powder
- 1 tsp dried oregano or thyme
If kids are sensitive to spices, just reduce the paprika.
How to cook (so everything roasts evenly)
- Preheat the oven ahead of time. 425°F (≈ 220°C). A high temperature matters — it gives you a golden crust and keeps the vegetables from turning watery.
- Cut vegetables to the right size. Potatoes should be larger than broccoli. This isn’t being picky — it’s a real necessity so everything finishes cooking at the same time.
- Mix the seasoning separately. Combine the oil and spices in a bowl. This helps them spread evenly instead of sitting in random patches on the pan.
- Spread everything in a single layer. Vegetables first, chicken on top. Don’t stack things — air needs to circulate freely.
- Toss with your hands. Yes, hands. That way the oil and spices coat every piece, and the chicken roasts more evenly.
- Roast without hovering. 30–35 minutes. You can flip the chicken once halfway through if you want, but it’s not required.
- Let it rest for 5 minutes. This allows the juices to redistribute, so the chicken stays juicy when serving.
If you know the day will be long, prep everything ahead of time: cut the vegetables at home, mix the seasoning in a jar, and pack the chicken and veggies together in a bag. In the evening, all that’s left is dumping everything onto a pan and turning on the oven.
What you can swap without risk
- chicken → turkey
- broccoli → cauliflower
- potatoes → sweet potatoes
The core idea stays the same: one pan, simple ingredients, high heat.
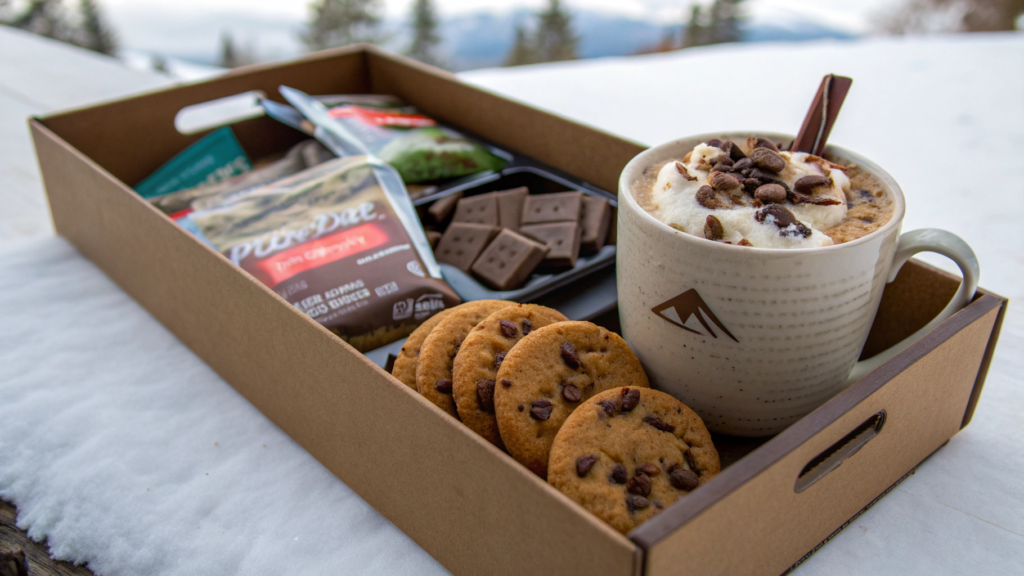
9. Hot Cocoa Snack Boxes for Post-Slope Cravings
After skiing, you really want something sweet, warm, and comforting. That’s exactly where hot cocoa snack boxes fit perfectly.
A warm drink and a small snack help the body relax, the mood levels out, and the evening goes much more calmly.
Plain cocoa is nice, but not for long. After an active day, the body needs some carbs, some fat, and that feeling of “I’ve eaten, I’m good.” That’s why the snack box format works better. Everything is already packed. Nothing needs to be searched for. Everyone grabs their own box — and there’s no arguing.
What goes into one snack box
Base:
- 1 packet of hot cocoa mix
- mini marshmallows or chocolate shavings
Filling add-ins (1–2 options):
- homemade cookies or an oat bar
- a small handful of nuts (almonds, cashews)
- chocolate pieces (dark works best)
For kids:
- animal-shaped crackers
- marshmallows
- small wafers
Important: nothing sticky and nothing that crumbles into dust.
How to assemble
- Choose containers of the same size. When everything looks the same, kids see it as a “real set,” not random food.
- Separate dry and sweet items. Cocoa goes into a separate compartment or packet. Snacks go separately. This keeps everything from getting soggy.
- Add one “slow” element. Nuts or a dense cookie slow things down and really extend that full feeling.
- Store everything in one place. The boxes should come out in one motion, without digging through drawers.
Cocoa is better made with milk or a milk-and-water mix, not just water. Fat helps hold heat and makes the drink feel richer.
If you’re using a thermos, preheat it with boiling water first — it really helps keep the drink hot longer.
A practical tip from trips
Assemble the snack boxes in the morning and put them on a separate shelf. After skiing, no one wants to wait. When the boxes are ready, you just heat the water — and five minutes later, everyone has a warm drink and a snack in their hands.
It’s a small thing. But it’s exactly these small things that make a trip feel comfortable instead of exhausting.
10. Family-Size Breakfast Casserole You Bake Once and Reheat All Week
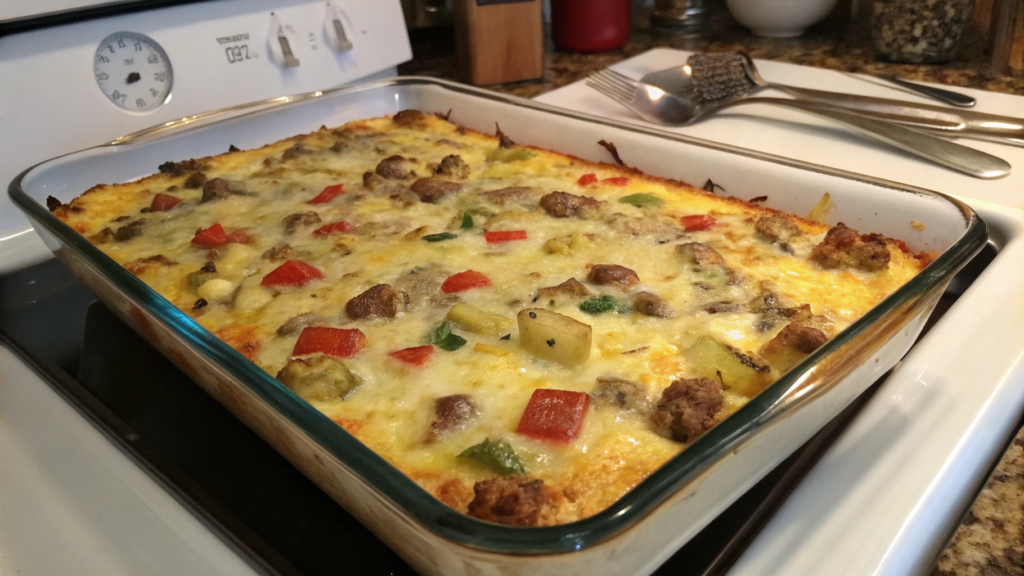
On trips, one thing matters a lot: is breakfast already ready. That’s exactly why a family-size breakfast casserole is one of the most reliable options. You cook once, then simply reheat it all week.
This isn’t a “lazy option” — it’s a smart one, because it’s made ahead, waits calmly in the fridge, reheats in portions (whoever wakes up first eats first), includes protein, fats, and carbs in one dish, and easily adapts to kids’ preferences.
Ingredients (for a large dish, 8–10 servings)
Base:
- 10 large eggs
- 1.5 cups milk or half-and-half (≈ 360 ml)
- 1 lb breakfast sausage or ground turkey (≈ 450 g)
- 2 cups shredded cheese (cheddar, Colby Jack) (≈ 200 g)
Add-ins:
- 3 cups frozen hash browns (≈ 450 g)
- 1 cup bell pepper, finely chopped (≈ 150 g)
- 1/2 cup green onions
Spices:
- 1.5 tsp salt
- 1/2 tsp black pepper
- 1/2 tsp paprika
- 1/2 tsp garlic powder
If kids are picky, make half the dish without vegetables. That’s completely fine.
How to cook (so it lasts all week)
- Brown the meat ahead of time. Cook the sausage or ground meat until done and remove excess fat. We want deep flavor, but without heaviness.
- Prepare the baking dish. Grease the dish with oil or butter. If you use glass or ceramic, it will hold heat better when reheating.
- Layer the ingredients. Start with hash browns, then meat, vegetables, and half of the cheese. Don’t pack the layers tightly — a bit of air helps everything cook evenly.
- Pour in the egg mixture. In a bowl, whisk the eggs with milk and spices. Pour slowly so the mixture spreads evenly through the dish.
- Add the remaining cheese on top. Spread it evenly — it will hold the casserole together as it bakes.
- Bake. 375°F (≈ 190°C) for 40–45 minutes. The center should be set, not liquid.
- Let it cool. At least 15 minutes. This matters — the casserole firms up and becomes easy to slice into portions.
Tip. Store in the fridge for up to 5 days, reheat portions in the microwave for 1.5–2 minutes, and cover if needed so it doesn’t dry out.
A practical tip from trips
Don’t add too much liquid. The casserole should be firm, not “eggy.” In the cold and after reheating, a denser structure keeps both flavor and texture much better.
How do you prep for a trip?
I’m always curious how the same challenges get solved in different families. Everyone has different kids, different habits, and different levels of patience for cooking while traveling. What works best for you?
Which meals do you prep ahead and bring along without hesitation?
What didn’t work, even if it looked good in the recipe?If you try something from this article on your next trip, come back and share how it went. Real stories like that help other families prepare for mountain trips more calmly and confidently.
